
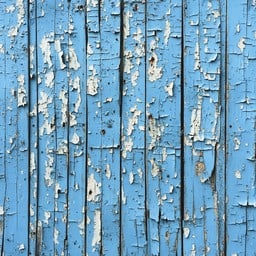
How to Paint a Wooden Fence in Camps Bay: A Step-by-Step Guide
A beautifully painted wooden fence adds privacy, security and kerb appeal to any property. In Camps Bay, however, maintaining a timber fence requires more than simply applying a fresh coat of paint. The suburb’s coastal environment creates unique challenges that can quickly cause paint to peel, crack, blister or fade if the correct preparation and products are not used.
Whether you are a homeowner, estate manager, landlord or property manager, understanding why paint fails on wooden fences and how to repair the damage properly will help you protect your investment for years to come.
This guide explains why paint deteriorates on wooden fences in Camps Bay, how to repair existing damage, and the professional step-by-step process for achieving a long-lasting finish.
Why Wooden Fence Paint Fails in Camps Bay
Camps Bay enjoys one of South Africa’s most spectacular coastal locations. Unfortunately, the same environment that creates breathtaking views also places enormous stress on exterior timber.
The biggest contributors to paint failure include:
- Salt-laden sea air
- Intense ultraviolet (UV) sunlight
- Strong south-easterly winds
- Heavy winter rainfall
- Constant expansion and contraction of timber
- Moisture trapped beneath paint coatings
Unlike brick or plaster walls, timber is constantly moving as temperatures and moisture levels change. If the paint system cannot flex with the wood, cracks soon develop and allow water to penetrate beneath the coating.
Common Signs Your Fence Needs Repainting
Many property owners wait until their fence looks severely weathered before taking action. Unfortunately, this often means repairs become more expensive.
Look for these early warning signs:
- Peeling paint
- Flaking coatings
- Bubbling or blistering
- Cracked paint
- Faded colour
- Grey weathered timber
- Soft timber
- Surface mould or mildew
- Splitting boards
- Rust stains around nails and screws
Addressing these issues early prevents structural deterioration and extends the life of the entire fence.
What Causes Paint to Peel on Wooden Fences?
Salt Air
The Atlantic Ocean produces airborne salt particles that settle on exterior surfaces every day. Salt attracts moisture, accelerates coating breakdown and reduces paint adhesion.
Moisture Penetration
Rainwater entering through open joints, cracks or exposed end grain becomes trapped beneath paint. As temperatures rise, this moisture expands and forces the paint away from the timber.
Poor Surface Preparation
Painting over dirt, chalk, mould or loose paint is one of the biggest reasons coatings fail prematurely.
Using Interior Paint Outdoors
Interior paints lack the flexibility and weather resistance needed for exterior timber.
Low-Quality Paint Products
Cheap paints often contain fewer premium resins and UV stabilisers, causing them to fade and crack much faster under Camps Bay’s intense sunlight.
Painting Damp Timber
Timber that has not dried sufficiently traps moisture beneath the coating, resulting in bubbling and blistering within months.
Step 1: Inspect the Entire Fence
Before beginning any painting work, inspect every section of the fence carefully.
Look for:
- Loose boards
- Rotten timber
- Damaged posts
- Rusty screws or nails
- Cracks
- Loose paint
- Signs of insect damage
- Water staining
Any structural problems should be repaired before painting begins.
Step 2: Wash the Fence Thoroughly
Cleaning is one of the most overlooked steps.
Remove:
- Salt deposits
- Dust
- Bird droppings
- Mould
- Algae
- Cobwebs
- Loose dirt
Use a suitable exterior timber cleaner or fungicidal wash where necessary.
Allow the fence to dry completely before continuing.
Step 3: Remove Loose Paint
All peeling and flaking paint must be removed.
Professional painters normally use:
- Paint scrapers
- Orbital sanders
- Wire brushes
- Detail sanding tools
The goal is to create a sound surface for the new coating system.
Step 4: Sand the Timber
Sanding smooths rough timber, removes weathered fibres and improves paint adhesion.
Pay particular attention to:
- Board edges
- Repairs
- Exposed timber
- Previous paint edges
Step 5: Repair Damaged Timber
Replace rotten boards wherever possible.
Small defects may be repaired using exterior-grade timber filler designed for outdoor use.
Loose fasteners should be tightened or replaced with corrosion-resistant alternatives.
Step 6: Prime Bare Timber
A quality exterior wood primer seals porous timber, improves adhesion and blocks tannin staining.
Never skip the primer on newly exposed wood.
Step 7: Apply Premium Exterior Paint
Choose a high-quality exterior acrylic or flexible wood paint designed specifically for timber.
Premium paints provide:
- UV protection
- Excellent flexibility
- Superior adhesion
- Colour retention
- Moisture resistance
- Longer maintenance intervals
Apply two full coats according to the manufacturer’s recommended drying times.
Step 8: Inspect Before Finishing
After the second coat dries, inspect the entire fence.
Look for:
- Missed areas
- Thin coverage
- Runs
- Brush marks
- Uneven colour
Touch up where necessary to ensure a uniform professional finish.
Preventing Future Paint Failure
Proper maintenance dramatically extends the lifespan of painted timber fences.
- Wash the fence annually to remove salt deposits.
- Inspect after winter storms.
- Repair cracks immediately.
- Trim vegetation touching the fence.
- Replace damaged boards quickly.
- Keep sprinklers from soaking timber.
- Inspect posts for movement.
- Touch up damaged paint promptly.
- Use premium exterior coatings.
- Schedule professional inspections every few years.
Why Professional Preparation Matters
The quality of a paint job depends far more on preparation than on painting itself. Proper cleaning, repairs, sanding, priming and moisture management determine how long the coating will last.
Skipping preparation may save time initially, but it almost always results in premature paint failure and significantly higher maintenance costs.
Conclusion
Painting a wooden fence in Camps Bay involves much more than choosing an attractive colour. The area’s harsh coastal climate demands careful preparation, quality repairs and premium exterior paint systems capable of withstanding salt air, strong UV exposure and seasonal rainfall.
By identifying peeling, bubbling, flaking and cracking paint early, repairing the underlying causes and following the correct painting process, homeowners and property managers can dramatically extend the life of their timber fencing while maintaining the beauty and value of their property.
FAQs About Painting Wooden Fences in Camps Bay
Why does paint peel on wooden fences in Camps Bay?
Paint often peels because of salt air, strong UV exposure, moisture trapped in the timber, poor preparation, or using paint that is not suitable for exterior wood.
Can I paint over flaking fence paint?
No. Loose, peeling or flaking paint must be scraped and sanded off first. Painting over unstable paint will cause the new coating to fail quickly.
Should a wooden fence be primed before painting?
Yes. Bare timber should always be primed with a suitable exterior wood primer to improve adhesion, seal the surface and help prevent stains from bleeding through.
How many coats of paint does a wooden fence need?
Most wooden fences need one coat of primer on bare areas and two coats of quality exterior paint for proper protection and an even finish.
How do I prevent fence paint from peeling again?
Clean salt deposits regularly, repair cracks early, keep plants away from the fence, avoid constant sprinkler contact and use premium exterior coatings designed for timber.
When is the best time to paint a wooden fence in Camps Bay?
The best time is during dry, mild weather when the timber is fully dry and there is no rain expected during the drying and curing period.